워드프레스는 웹사이트 및 블로그를 생성하고 관리하기 위한 오픈소스 CMS(Content Management System: 콘텐츠 관리 시스템)입니다. 워드프레스는 PHP 언어로 작성되었으며, MySQL 데이터베이스를 사용하여 데이터를 저장합니다. 워드프레스는 사용하기 쉽고 다양한 테마와 플러그인을 제공하여 사용자들이 웹사이트를 원하는대로 커스터마이징할 수 있습니다.

워드프레스를 사용하기 위해 가입형과 설치형이 존재하며 이 중 설치형으로 개인 서버에 구축하는 방법에 대해 알아봅시다.
워드프레스(Wordpress) 개인 서버 구축: 필수 도구
워드프레스 설치를 위해서는 서버에 아래 소프트웨어 필히 필요합니다.
- 운영체제 (Ubuntu 18.04)
- php
- web (apache 2)
- db (Mysql)
그럼 워드프레스 및 각 필수 도구들에 대한 설치 방법을 안내합니다.
워드프레스(Wordpress) 개인 서버 구축: PHP 설치
Ubuntu에서는 아래 명령어를 통해 설치할 수 있습니다.
sudo apt install php php-mysql
워드프레스(Wordpress) 개인 서버 구축: 워드프레스 다운로드
워드프레스 설치를 위해 아래 공식 사이트에서 모듈을 다운로드 받습니다.
Blog Tool, Publishing Platform, and CMS - WordPress.org 한국어
아름다운 웹사이트, 블로그, 또는 앱을 쉽게 만드는 데 사용할 수 있는 오픈 소스 소프트웨어
ko.wordpress.org
우측 상단 'Get WordPress' 클릭

워드프레스 6.2.2 다운로드 (최신버전 권장)
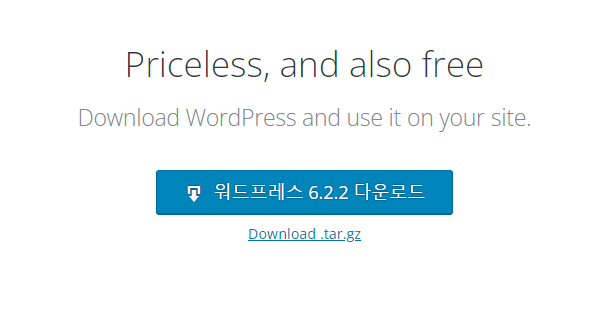
자신이 설치할 운영체제(OS)에 맞게 다운로드하면 되며,
여기선 Linux(Ubuntu) 서버에 설치할 예정이므로 Download.tar.gz 으로 다운로드 합니다.
다운로드가 완료되면 받은 파일을 Ubuntu 서버에 업로드 합니다.
업로드에 사용된 Tool 은 xFtp 를 사용하였습니다.
(개인 테스트용으로는 무료 지원이며 국민 ftp인 파일질라를 사용해도 됩니다. 사용 방법은 생략하겠습니다.)

위 이미지와 같이 /home/test 폴더에 파일을 업로드 하였습니다.
그럼 이제 업로드된 압축된 tar.gz 파일을 압축 해제 합니다.
tar xvfz wordpress-6.2.2-ko_KR.tar.gz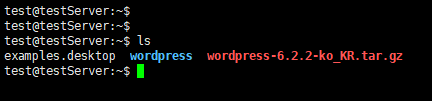
압축 해제 후 wordpress 폴더가 생성된 것을 확인할 수 있습니다.
참고.
접속 URL에 마지막에 /context 명을 없애기 위해 root path로 옮겨주자. (웹 서버 설정을 통해 할 수 있지만 간편한 설치를 위해)
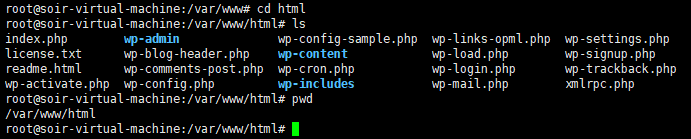
1. 기존 /var/www/html 폴더 안에 있는 index.html 파일을 삭제 합니다.
2. 압축해제한 wordpress의 하위 폴더 및 파일들을 /var/www/html 하위로 모두 이동시킵니다.
3. 그러면 아래와 같은 형상으로 완료됩니다.
워드프레스(Wordpress) 개인 서버 구축: Apache2 설치 및 세팅
1. apache2 설치
웹 브라우저에서 접속을 지원하기 위해 apache2 서버를 설치합니다.
지난 포스팅 내용을 참고하세요.
2022.12.15 - [IT/Middleware] - Apache SSL 적용 방법 #Feat. ubuntu 22.04
Apache SSL 적용 방법 #Feat. ubuntu 22.04
Apache 에 SSL 을 적용하는 방식에 대해 포스팅 합니다. SSL 적용 시 필요한 인증서를 생성하지 않았다면 아래 이전 포스팅을 참고하세요. 2022.12.15 - [IT/Middleware] - Apache SSL 인증서 생성 방법 Apache SSL
soir1984.tistory.com
2. 워드프레스 위치 설정 (context 를 잡아줬을 경우 해당)
apache2 설치가 완료되면 워드프레스가 설치된 위치를 잡아줘야 합니다.
(위에서 wordpress 의 관련파일들을 /var/www/html 로 옮겼을 경우에는 생략하셔도 됩니다.)
파일 : /etc/apache2/sites-available/000-default.conf
아래 코드와 같이 워드프레스가 설치된 위치로 변경해줍니다.
- 기존 내용 'DocumentRoot /var/www/html' 주석 처리
- 새로운 내용 'DocumentRoot /home/test' 추가 (워드프레스가 설치된 위치)
<VirtualHost *:80>
        # The ServerName directive sets the request scheme, hostname and port that
        # the server uses to identify itself. This is used when creating
        # redirection URLs. In the context of virtual hosts, the ServerName
        # specifies what hostname must appear in the request's Host: header to
        # match this virtual host. For the default virtual host (this file) this
        # value is not decisive as it is used as a last resort host regardless.
        # However, you must set it for any further virtual host explicitly.
        #ServerName www.example.com

        ServerAdmin webmaster@localhost
        # DocumentRoot /var/www/html       <-- 주석 '#'
        DocumentRoot /home/test            <-- 해당 내용 추가.

        # Available loglevels: trace8, ..., trace1, debug, info, notice, warn,
        # error, crit, alert, emerg.
        # It is also possible to configure the loglevel for particular
        # modules, e.g.
        #LogLevel info ssl:warn

        ErrorLog ${APACHE_LOG_DIR}/error.log
        CustomLog ${APACHE_LOG_DIR}/access.log combined

        # For most configuration files from conf-available/, which are
        # enabled or disabled at a global level, it is possible to
        # include a line for only one particular virtual host. For example the
        # following line enables the CGI configuration for this host only
        # after it has been globally disabled with "a2disconf".
        #Include conf-available/serve-cgi-bin.conf
</VirtualHost>
3. 워드프레스 폴더 접근 권한 추가
'/home/test' 폴더에 접근 가능하도록 권한을 추가해야 합니다.
(위에서 wordpress 의 관련파일들을 /var/www/html 로 옮겼을 경우에는 생략하셔도 됩니다.)
파일 : /etc/apache2/apache2.conf
아래 코드와 같이 '/home/test/' 폴더에 대해 접근 권한을 추가 합니다.
- 아래 코드 추가
# Sets the default security model of the Apache2 HTTPD server. It does
# not allow access to the root filesystem outside of /usr/share and /var/www.
# The former is used by web applications packaged in Debian,
# the latter may be used for local directories served by the web server. If
# your system is serving content from a sub-directory in /srv you must allow
# access here, or in any related virtual host.
<Directory />
        Options FollowSymLinks
        AllowOverride None
        Require all denied
</Directory>

<Directory /usr/share>
        AllowOverride None
        Require all granted
</Directory>

<Directory /var/www/>
        Options Indexes FollowSymLinks
        AllowOverride None
        Require all granted
</Directory>

# 해당 내용 추가
<Directory /home/test/>
        Options Indexes FollowSymLinks
        AllowOverride None
        Require all granted
</Directory>
해당 파일을 수정하였다면 서버 반영을 위해 apache2 를 재시작 해줍니다.
service apache2 restart
워드프레스(Wordpress) 개인 서버 구축: 워드프레스 접속
설치한 서버의 IP를 기반으로 설치된 워드프레스에 접속합니다.
여기선 서버의 IP주소가 192.168.10.154 이므로 아래 URL 로 접속합니다.
http://192.168.10.154
만약 위에서 context를 설정하셨다면 "http://12.168.10.154/폴더명" 으로 됩니다.
아래 이미지와 같이 워드프레스에 접속됨을 확인할 수 있습니다.

두 번째 포스팅에서는 MySQL 설치 및 세팅, 워드프레스 설치 및 세팅에 대해 설명하도록 하겠습니다.
워드프레스(Wordpress) 개인 서버 구축 방법 2 바로가기
2023.06.29 - [IT/Middleware] - 워드프레스(Wordpress) 개인 서버 구축 방법 2
워드프레스(Wordpress) 개인 서버 구축 방법 2
워드프레스(Wordpress) 개인 서버 구축하는 방법에 대한 두 번째 포스팅입니다. 첫 번째 포스팅에서는 워드프레스 설치에 필요한 apache2 와 php 설치 및 세팅 방법에 대해 알아보았습니다. 첫번째 내
soir1984.tistory.com
'IT > 기타' 카테고리의 다른 글
| 워드프레스(Wordpress) 개인 서버 구축 방법 2 (2) | 2023.06.29 |
|---|---|
| HTTP 전체 상태 코드 표 정리 (0) | 2023.06.27 |
| 구글 플레이 게임즈 베타 출시 (Google Play Games) (1) | 2022.11.15 |
| 워드(MS) 문서에 전자 서명 또는 도장 넣는 방법 (feat. 그림판) (1) | 2022.10.06 |
| 애드센스(AdSense) 승인 거절 해결 방법 공유 (0) | 2022.09.28 |


댓글